Monday, October 26, 2009

Granite is installed!


City Home Granite Depot came to install our granite today (above is a picture of it when the sealer was still wet, it's quite a bit lighter now). We were very impressed with the service we got from City Home, within 4 days of visiting them they came and measured our kitchen, and in 9 days from our first visit we got our counters. The people there were also really nice. The lady that did the measuring was a bit concerned about our unsquare walls and offered some good tips on things they could do with the granite to camouflage some imperfections. The installers also took a lot of time to make things perfect. At one point my better half said a piece looked ok, but the guy still spent more time moving it around to get it "just so". His partner let us know that this installer was apparently a bit of a perfectionist.

We had also noted some dark spots on the first slab they showed us when we were in the store (we were looking for a very light/smooth look), so they had gone and picked us a lighter more consistent piece for the install (they also have a policy of informing you if your granite will be significantly different than the sample piece).

Overall we were very pleased with the service at City Home Granite Depot. It really felt like they were trying to make us happy rather than just take our money and install some granite. If you're looking for cheap pre-fab granite in Toronto we would definitely recommend them.

Disclaimer: No, we did not get any kick-back from the nice folks at City Home Granite Depot. We paid full price :oP and they really are this good!

Sunday, October 25, 2009

Still chuggin along

Yet another week has elapsed in our kitchen reno. Most of the cupboard doors are now installed except for the one we're waiting on and the ones that go under the sink.

We also got appliances yesterday. They were a bit more work than anticipated. Our fridge came with an ice maker that we didn't know about so we got to run a waterline into the unfinished basement. This will be a nice feature in the summer when we're making jugs of margaritas in our Vitamix.

Today the better part of our day was spent installing the over-range microwave. Nothing about the install was too hard, but there was definitely a lot to do. We got to cut a hole to the outside and install the vent. We also had to move the electrical wire we had run for the microwave because we had hoped it would be able to plug in behind itself but the microwave required a plug in the cupboard above it instead.

Overall we're pretty happy with the appliances so far. They were a really good bargain and they look really nice. We'll see how performance is, but we've read good things about Samsung so far.


This week we knocked another item off our to-do list. We groom our dog Trinity ourselves, usually in the kitchen. Since the kitchen is now a bit more usable she got a much needed hair cut :D

Wednesday, October 21, 2009

Ikea Kitchen: Installing your kitchen


Installing Ikea cabinets is probably a bit easier then buying them :oP. They even come with a handy DVD showing a family with a small child, baby and dog assembling/installing them together as some sort of strange rainy day activity.

Assembling the boxes is significantly easier than assembling regular Ikea furniture. We got 4 boxes assembled at a leisurely pace in about 1.5 hours. The next day we took about 2 hours to hang these four and the one last upper on the wall. We waited to assemble the last cupboard because were weren't sure if it would be 12 or 15 inches. Ikea cabinets come with a rail mounting
scheme for the upper cabinets. This makes mounting the cabinets very easy (you just have to be very careful in leveling the rod and then from there it's a pretty simple task).

Base cupboards took a little longer to build because they had drawer hardware (which is much easier to install while assembling the cabinet). The base cabinets get mounted with a ledger board along the wall.

The doors all went on pretty easily too. The blum hinges just snap together and with some slight adjustments you have nice level working doors. Given that one of us is a very big perfectionist we were a bit worried that installing the cabinets would make us a little crazy, but really it went as smooth as it could (minus some unsquare walls etc). After about 2 days worth of labour this is where we're at with the kitchen. We still have to rip some filler pieces and put them in, but it's really starting to come together.


Monday, October 19, 2009

Ikea Kitchen: Buying your kitchen

Our kitchen is chugging along. There is so much to blog about regarding the Ikea kitchen install process (which luckily is not nearly as bad as people would have you believe) so we're breaking it down into general topics.

Today's topic is "buying your cabinets" or "when not to listen to the Ikea staff".

When we went in to buy our cabinets we had measured our room at 137.5". As a verifying step the sales person totaled our cabinet lengths to verify that they would fit. This calculation went as follows:
24 (DW) + 30 (sink) + 36 + 30 (stove) + 15 = 135 (2 inches spare).

However, the sales person said that we would need to put cover panels on either side of the sink and stove cupboards (because the cupboards change in height there) pictured below. These filler pieces would have totaled 2 inches (4, 1/2" filler pieces). Leaving us with 0 inches to spare.

So we get our cupboards. We notice that she only ordered these cover panels for the top (so our bottom cabinets would have been off by an inch starting at the sink wtf...). We were also a bit skeptical of inserting cover panels in the middle of the run for aesthetic reasons. Upon assembling the cupboards and checking it out our suspicions were confirmed, the sales person had no fricken clue what she was doing. Yes, the sides of the cupboards is ugly, but anyone with a table saw can do this without needing to insert whole cover panels. For the sink we are ripping cover panels down to go along the sides and top of the area under the cupboards. This wasn't possible for the stove cabinets because the cover pieces would have interfered with the over-range microwave. We could have just put the cover panels on the sides under the microwave but that seemed kind of odd too. Luckily we made the following discover:

Tile backsplash fills most of the gap between the side of the cupboards and the wall (caused by the mounting rail hardware). So over the stove we will put the backsplash and then caulk the little bit of gap that is left.

All of this means that we really don't need those filler pieces after all! But, based on the fact that we would have 0 inches clearance we had gone ahead and ordered a 12 inch cupboard. Leaving us with....
Yes, readers you are reading that right... 17 inches of extra space. Meaning the 12 inch cupboard would have left us with 5 inches of filler along the one side. Luckily we anticipated this and had gone and picked up a 15 inch cabinet frame as back up but we'll still have to wait 1-2 weeks for the door/drawer for it to come from Montreal.

Long story short, if you're planning an Ikea kitchen do the check of adding up the cupboard lengths ahead of time. Also, trust your gut when it comes to filler pieces/cover panels. The staff mean well but if something seems wrong it probably is. :oP

Saturday, October 17, 2009

Stairs...

... because climbing in and out of the back of your house gets old fast.


This picture makes me think it's time we ordered another dumpster :\. We got 1 for the main demo but weren't sure how long the bulk of the reno would take so we were waiting til we got close to being done to order another. Now this just looks sad... :P

We also snuck out and ordered our granite today. We had our hearts set on torontogranite.com but the shipment of Kashmir white they had just gotten in was very grey and kind of dark. So we drove to City Home Granite Depot and they ended up having Kashmir white with more warmer tones in it. They showed us the piece we would get installed and we booked measurement/install with them. Torontogranite.com did have some more in stock than when we first went though. They had a white, a creme and a chocolate brown marble in stock that were pretty beautiful, if we weren't so set on the white granite they would have been tempting.

All that and a bag of grout

Cabinets arrive today. *woo*!

Monday, October 12, 2009

Long weekend

We had a long weekend of sanding, priming, painting and tiling. Here are some pics.


Monday, October 5, 2009

We got plastered this weekend


Not nearly as fun as the horrible pun would have you believe ;o)

Saturday, October 3, 2009

Cabinets *check*

So we headed to Ikea today to order our cabinets. It was not a great experience. First we found out that our design fit *too* good (ie. we had 0 inches to spare which meant we risked it not fitting while installing). So we had to shave 3 inches off of our design. To do this we switched out the 15 inch cabinet next to the stove for a 12 inch one with a pull out that will hold baking sheets etc. We then got to wait around for them to enter in our order. Although the planner claims to give you a whole shopping list they will calculate what you need based on your cabinets and add all the filler pieces etc. So in the end we were given a crazy incomprehensible list of bits and pieces for the kitchen. This all would have been tolerable except that we found out that the home planner you use at home apparently gives a really crappy estimate on price. Even between the plan the Ikea staff member made and the final order there was about a $300 difference. If it wasn't still half the price of Home Depot I'd be more mad. As it is I'm just pretty annoyed.

Here is the design we ended up with.

Upstairs Bathroom Layout


Someone asked us for more detail about the layout of our upstairs bathroom. Here is the layout with dimensions. It took us a really long time to come up with this layout. The stack in the corner precluded more standard layouts and we were determined to not be able to wash our hands while sitting on the toilet!

There is quite a bit of room around the toilet in this layout so it could probably be done with a less wide bathroom and depending on the size of the stack and how small the framing can be done around it you might also be able to get away with the room being shorter too. The measurements are pretty important for making this layout work, if you're doing it yourself measure everything really carefully (just to make sure the vanity will fit etc.).

This layout is nice because it makes the room feel really spacious when you walk in (because you walk into the largest open space in the room). One consideration is to make sure you get a good shower curtain solution otherwise the vanity can get splashed a little, but we haven't found it to be a huge problem.

Our contractor neighbor actually re-created the layout of our bathroom for one of our other neighbors that also had a badly placed stack. It was kind of funny and flattering, although having him come over every morning to measure stuff was a bit odd.

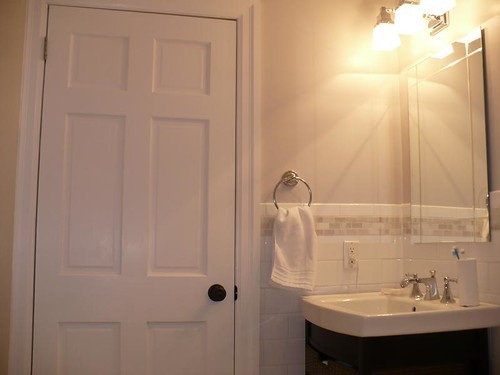
Here's some pictures of what it looks like in real life, there are more throughout the blog too ;o).

Friday, October 2, 2009

Just add drywall


It's been a long hard crazy week. We both now have colds and somehow we managed to hang all the drywall. We're kind of amazed how fast this has all come along. I guess there is something about not having a kitchen that makes it all seem more urgent :oP . A long weekend of plastering ahead...