Monday, December 22, 2008

Welcome home


In less than 12 hours a brave set of parents will be coming to visit us. Here are some pictures of what will be greeting them.


Living Room/Dining Room:

These rooms have consumed most of our time these past few months and are our most finished space.


Kitchen
This room is still on our to-do list. The main progress in this room came when our dining table returned to its place in the dining room (it took up a good amount of the kitchen!).


Bathroom

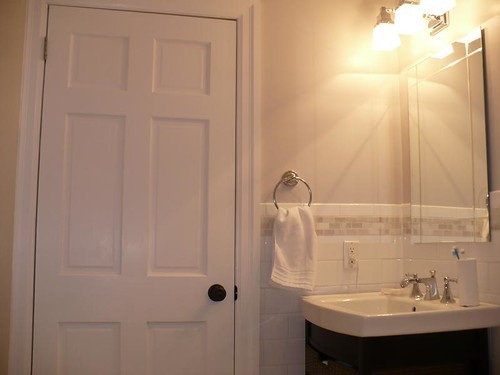
This room is next on our to-do list (after some last electrical/insurance inspections *ugh*). It may not look too bad in this picture, but creative cropping is hiding a hole in the floor covered with plywood and some holes in the plaster and lathe from our electrician.
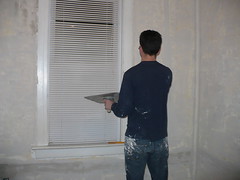
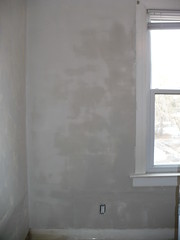
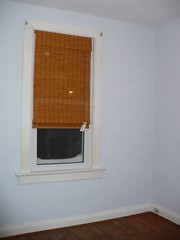


Guest Bedroom


This is where my parents will be resting their heads. We patched the holes in the plaster left by our electrician. The trunk in the second picture is an antique we picked up in Vernon (BC) one summer. It's a nice place to put extra blankets for guests.
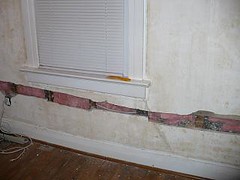
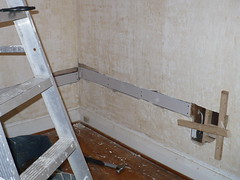

"Master" Bedroom
Yes, this is where we sleep right now. The channel you see was cut so that we could have a plug in next to our closet that we will probably never use (not to sound bitter or anything...). We'll be fixing it the same way as we fixed up the guest bedroom.


That's all folks!
Here's hoping next year brings more renovation progress.

Below is a picture of our most recent project.. a maze in the snow for Trinity.


Friday, December 19, 2008

Busted Plaster: Round 5 & Conclusions


The last stages of plastering were less exciting than the first parts (*yay*). After sanding we primed using a tinted primer. After the tinted primer we went over the walls and patched any left over ridges/pock marks that we missed during the sanding phase (once you have enough plaster dust in your eyes it all looks smooth :P). After sanding the patches we painted the walls and finished our adventures with fixing plaster. Below are some pictures from various phases of the plaster job. Most of the pictures are of the same wall (with the window) for reference.


A small note: Any references to products are for informational purposes only, we did not get any money from the makers of these products.

Photo Issues

There were some issues with some Flickr photos in our older posts. They should be resolved now.

Tuesday, December 16, 2008

Busted Plaster: Round 4


Not quite the white Christmas we were hoping for...

Today we did the least pleasant part of plastering... sanding. When we did our drywall taping we were pretty shocked with how unpleasant sanding can be (nevermind that our complete lack of skillz meant there was a lot to sand). Being a type A personality it's very easy to get very neurotic when you start to sand, obsessing over every dimple, every crater. Our contractor friend came over during that first project and informed us that we were being a bit nuts and that primer would help a lot (and it does!).

Since our last plaster project (drywall seams in our living/dining rooms) our plastering has improved a bit so we had a lot less to sand and we were a bit more realistic with our expectations. Even with these advantages, I have to say sanding is something I would not wish on my worst enemy. Combine a respirator with a stuffy little room (because it's sealed off so dust won't go in other parts of the house), add ample amounts of dust and you have a great evening of work :P.

At least it is done now and we are on to bigger and better things... like primer and Ikea furniture. *woo*

Sunday, December 14, 2008

Busted Plaster: Round 3

This weekend we continued skim coating. On top of our original thin layer of Durabond 90 we put 2 layers of Sheetrock 90. This is another setting type compound, but unlike Durabond it is sandable. Given our limited plastering experience the Sheetrock was more forgiving for the bulk of the skim coating.


Thursday, December 11, 2008

Busted Plaster: Round 2

Since our last entry we've continued patching and plastering the guest room. Here's a step by step of what we did.

1. holes where there is no lathe and no studs visible:
For these holes we had to modify our original strategy slightly. We ended up putting some drywall screws through the wood that we had attached to the backside of the remaining plaster and lathe. This helped keep them in place when we screwed drywall patches into them.


2. holes with just lathe:
For holes in the plaster where the lathe remained we cut patches out of 1/4 inch drywall. Similar to what we did for holes where only studs remained, but the thinner drywall was needed so that it would not be thicker than the plaster.


the main event: plaster
After patching all the holes as best we could we got started on skim coating. We started out by doing a very thin coat of Durabond 90 (a non-sandable compound that will set up in about 90 minutes) over the walls/ceiling. We used extra Durabond to fill in around our drywall patches and a little extra on the cracks with the fibreglass tape. In some spots the corners of the plaster were a bit cracked too. We treated these like a regular corner drywall seam with paper tape.


Wednesday, December 3, 2008

Busted Plaster: Round 1

We're on our way to getting the guest bedroom ready for plaster. Today's task was putting various things into the holes so that we could put plaster over top. Here's a breakdown of the different types of holes we tackled.

1. holes where there is no lathe and no studs visible:
For these holes we put PL (construction adhesive) on a thin piece of wood. Then we tied a string around the wood and put it in the wall, using the string to pull the wood so it could stick to the back side of the lathe. We then used the string to tie the wood to another piece of wood that sits on the outside of the plaster. This other piece of wood + the string will hold the wood in place until the PL dries.


2. holes with no lathe, where studs are available
These holes were more straightforward to fill. We used some left over drywall strips (3/8") and screwed them to the studs. A small before and larger after is below.


3. cracks
These aren't really holes. They're just cracks. We put fibre glass tape over them. They will be treated like mini drywall seams.


Well these were today's plaster demons. Stay tuned for holes where only lathe is exposed, finishing up the holes that had no lathe and no studs and the main event, plaster!

Small disclaimer: This is our solution to the plaster problems we faced. Mileage may vary.

Tuesday, December 2, 2008

Main floor update + picking colors for the guest room

The grate(s) we ordered arrived at The Door Store this past week, so we finished up the flooring and got the majority of the downstairs trim done this weekend. Given that we have a guest room to redo before the holidays this is likely it for the main floor for a bit. We've started making the space a bit festive for the holidays with a tree and some furniture.


The guest bedroom has been on hold for a bit while we finished up the main floor. We had a bit of a rush since our neighbor that lent us most of the tools needed them back today. Tomorrow we'll be starting up with insulation and putting some drywall in the holes. Then it's on to durabond and 2 coats of sheetrock.

We did pick up some paint chips today. Trinity has an eye for color and decided to help us out with our selection.