Sunday, December 27, 2009

Welcome Home 2


Last year we did a post summarizing our progress from moving in to Christmas with the folks. Here is what we've been up to this past year:

Living/Dining Room:


The main change in these rooms since last year is the new table/chairs and hole to the kitchen. The living room doesn't look too different from last year... the blinds still really need to be hemmed and we're really not sure what to do with the awkward spot currently filled by the Christmas tree.

Kitchen:

The kitchen has been the most recent and biggest change since last year.

Bathroom:
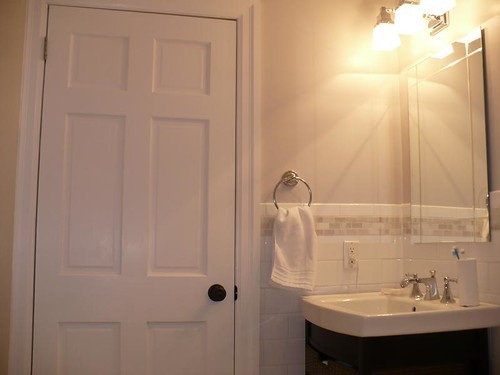
The upstairs bathroom was another major transformation since last year. It's easy to forget how sketchy some of these spaces used to be...

Guest Bedroom:

The guest bedroom got new floor, trim, another skim coat of plaster and another coat of paint (matte instead of egg shell, the matte really does help hide plaster flaws alot!). The new floor and trim went a long way towards making this space more comfortable. The room now has a desk and is an occasionally used home office/guest room.

Master Bedroom:

This room also got new floors/baseboard (we saved the window/door casings since this was the one room with trim worth saving). We also took down a wall to insulate and drywalled the rest of the space.

Basement:


This past year the basement got a new bathroom, furnace and hot water heater. It has since descended back into chaos as the rest of the house has become more livable.


Our task for the new year is to run some new pex piping, add a drain for the furnace + some new drains for the washing machine and back door (for future restructuring of the back walk up). The main driving force behind this project is the need to insulate the basement to take advantage of some nice incentives offered through the eco energy audit program. The eventual goal is to finish the space, but for now we're focusing on just getting it insulated to get the rebate.

We've had a nice break from the house for a while but are eager to get going on our next project.

Hope everyone out there had a good holiday :o)

Wednesday, December 2, 2009

Putting the kitchen to good use


Ginger man/lady. Note the lady gets the sawzall while the man has to use the hand saw.. hehehe

Here's the recipes we used:
Gingerbread
Icing

Sunday, November 29, 2009

Update

There hasn't been much to blog about lately. Since finishing the kitchen we've been mainly tidying up the house, cooking/baking, and keeping busy with school/work. We also took a weekend trip to Quebec as a break from the house.


One project that did get us to pick up a power tool (ok the one of us who was determined to be the only house on our street with Christmas lights) was hanging Christmas lights on our porch. When we got our house rewired the electrician offered us external GFCI outlets on the front/back but we only got one on the back since we couldn't think of why we would need one on the front. Then came Christmas time and we realized why having a GFCI on the front of the house is a good idea (lights!). Luckily by now we're confident enough with our electrical skillz that we were able to add the new outlet ourselves. And here is the result:

Much more festive than last year :o)

Sunday, November 8, 2009

Kitchen Is Done!

Yes, the kitchen reno is done. We've spent the weekend moving back into the kitchen and unpacking quite a bit of kitchen stuff that has been sitting in our basement for the past year.

Here are some before/after pictures of it. Overall we're really happy with how it came out. We found a lot of good inspiration online that made putting the whole thing together a lot easier. In particular we found the kitchen at Rambling Renovators to be a good resource. We also spent a good amount of time watching Sarah's House 2 on HGTV by Sarah Richardson.

This is a collage we made when submitting our kitchen to CityTV's 48 hour renovation contest. It does a pretty good job of capturing the hideous "old lady peach" that the room used to be.


... and here is the kitchen now:


The fridge is a 33" counter depth by Samsung that we got a great deal on.


Given the lack of counter space we have we decided to dedicate a drawer to being a spice rack. We cook alot and digging through 24 jars to find cumin gets old fast. This drawer is right next to the stove, super convenient.


We went with a Fridgidaire dishwasher because it was the cheapest dishwasher that was all stainless (on the outside anyways...).


Here is the tiny eating nook we made where I am typing this right now :o).


This is our coffee station, super close to the eating nook. We pretty much optimized this side of our kitchen for getting breakfast/coffee in a hurry.


We started demolishing our kitchen on Sept. 19 and are now working in a finished kitchen on Nov. 8. Note that we are the exception and not the rule, but we think it's important to mention that, yes, if you have the skill/motivation a 100% DIY kitchen renovation can be had in a timely manner. One advantage of DIY is that you can work as fast or as slow as you want on your kitchen. In our case, we worked quite hard on the kitchen (this means getting up early even on weekends and pulling a solid 10+ hr day to make up for the fact that you are not a contractor that can do 8 hr days each week day). I'll admit it wasn't always easy or fun, but doing it ourselves also meant that the work was up to our standard. We (ok one of us in particular) is quite anal. Doing it ourselves mean knowing that the drains/wiring were all up to code. Also on the aesthetic side we got to include little details such as putting returns on the end of runs of baseboard. We also were able to give our Ikea kitchen a more custom look using backfeeds and hardwired undercabinet lighting. We also had the advantage of not having to wait on other people's schedules to get the work done.
Design/cost wise, we followed some advice we saw HGTV from Sarah Richardson. Her advice is to save on the cupboards and floors and then splash out on counter/backsplash/appliances. We went with this approach and especially as a result of the Ikea cupboards we ended up with a much nicer kitchen than if we had gone with similarly priced home depot cupboards.

Sunday, November 1, 2009

Finishing up...

... is as always dragging on. The little bits that finish a room always seem to take so long relative to the major stuff. Hanging drywall, plastering, flooring, all take about the same time as the finishing but seem to give so much more pay off in terms of "progress" it seems.

Here's what we've been up to this week in pictures. We've been busy with trim, backsplash and enjoying our new toy (a dishwasher!).

Still a lot of caulking, under cabinet valence, painting trim, and much needed handles (!) to go..


Monday, October 26, 2009

Granite is installed!


City Home Granite Depot came to install our granite today (above is a picture of it when the sealer was still wet, it's quite a bit lighter now). We were very impressed with the service we got from City Home, within 4 days of visiting them they came and measured our kitchen, and in 9 days from our first visit we got our counters. The people there were also really nice. The lady that did the measuring was a bit concerned about our unsquare walls and offered some good tips on things they could do with the granite to camouflage some imperfections. The installers also took a lot of time to make things perfect. At one point my better half said a piece looked ok, but the guy still spent more time moving it around to get it "just so". His partner let us know that this installer was apparently a bit of a perfectionist.

We had also noted some dark spots on the first slab they showed us when we were in the store (we were looking for a very light/smooth look), so they had gone and picked us a lighter more consistent piece for the install (they also have a policy of informing you if your granite will be significantly different than the sample piece).

Overall we were very pleased with the service at City Home Granite Depot. It really felt like they were trying to make us happy rather than just take our money and install some granite. If you're looking for cheap pre-fab granite in Toronto we would definitely recommend them.

Disclaimer: No, we did not get any kick-back from the nice folks at City Home Granite Depot. We paid full price :oP and they really are this good!

Sunday, October 25, 2009

Still chuggin along

Yet another week has elapsed in our kitchen reno. Most of the cupboard doors are now installed except for the one we're waiting on and the ones that go under the sink.

We also got appliances yesterday. They were a bit more work than anticipated. Our fridge came with an ice maker that we didn't know about so we got to run a waterline into the unfinished basement. This will be a nice feature in the summer when we're making jugs of margaritas in our Vitamix.

Today the better part of our day was spent installing the over-range microwave. Nothing about the install was too hard, but there was definitely a lot to do. We got to cut a hole to the outside and install the vent. We also had to move the electrical wire we had run for the microwave because we had hoped it would be able to plug in behind itself but the microwave required a plug in the cupboard above it instead.

Overall we're pretty happy with the appliances so far. They were a really good bargain and they look really nice. We'll see how performance is, but we've read good things about Samsung so far.


This week we knocked another item off our to-do list. We groom our dog Trinity ourselves, usually in the kitchen. Since the kitchen is now a bit more usable she got a much needed hair cut :D

Wednesday, October 21, 2009

Ikea Kitchen: Installing your kitchen


Installing Ikea cabinets is probably a bit easier then buying them :oP. They even come with a handy DVD showing a family with a small child, baby and dog assembling/installing them together as some sort of strange rainy day activity.

Assembling the boxes is significantly easier than assembling regular Ikea furniture. We got 4 boxes assembled at a leisurely pace in about 1.5 hours. The next day we took about 2 hours to hang these four and the one last upper on the wall. We waited to assemble the last cupboard because were weren't sure if it would be 12 or 15 inches. Ikea cabinets come with a rail mounting
scheme for the upper cabinets. This makes mounting the cabinets very easy (you just have to be very careful in leveling the rod and then from there it's a pretty simple task).

Base cupboards took a little longer to build because they had drawer hardware (which is much easier to install while assembling the cabinet). The base cabinets get mounted with a ledger board along the wall.

The doors all went on pretty easily too. The blum hinges just snap together and with some slight adjustments you have nice level working doors. Given that one of us is a very big perfectionist we were a bit worried that installing the cabinets would make us a little crazy, but really it went as smooth as it could (minus some unsquare walls etc). After about 2 days worth of labour this is where we're at with the kitchen. We still have to rip some filler pieces and put them in, but it's really starting to come together.


Monday, October 19, 2009

Ikea Kitchen: Buying your kitchen

Our kitchen is chugging along. There is so much to blog about regarding the Ikea kitchen install process (which luckily is not nearly as bad as people would have you believe) so we're breaking it down into general topics.

Today's topic is "buying your cabinets" or "when not to listen to the Ikea staff".

When we went in to buy our cabinets we had measured our room at 137.5". As a verifying step the sales person totaled our cabinet lengths to verify that they would fit. This calculation went as follows:
24 (DW) + 30 (sink) + 36 + 30 (stove) + 15 = 135 (2 inches spare).

However, the sales person said that we would need to put cover panels on either side of the sink and stove cupboards (because the cupboards change in height there) pictured below. These filler pieces would have totaled 2 inches (4, 1/2" filler pieces). Leaving us with 0 inches to spare.

So we get our cupboards. We notice that she only ordered these cover panels for the top (so our bottom cabinets would have been off by an inch starting at the sink wtf...). We were also a bit skeptical of inserting cover panels in the middle of the run for aesthetic reasons. Upon assembling the cupboards and checking it out our suspicions were confirmed, the sales person had no fricken clue what she was doing. Yes, the sides of the cupboards is ugly, but anyone with a table saw can do this without needing to insert whole cover panels. For the sink we are ripping cover panels down to go along the sides and top of the area under the cupboards. This wasn't possible for the stove cabinets because the cover pieces would have interfered with the over-range microwave. We could have just put the cover panels on the sides under the microwave but that seemed kind of odd too. Luckily we made the following discover:

Tile backsplash fills most of the gap between the side of the cupboards and the wall (caused by the mounting rail hardware). So over the stove we will put the backsplash and then caulk the little bit of gap that is left.

All of this means that we really don't need those filler pieces after all! But, based on the fact that we would have 0 inches clearance we had gone ahead and ordered a 12 inch cupboard. Leaving us with....
Yes, readers you are reading that right... 17 inches of extra space. Meaning the 12 inch cupboard would have left us with 5 inches of filler along the one side. Luckily we anticipated this and had gone and picked up a 15 inch cabinet frame as back up but we'll still have to wait 1-2 weeks for the door/drawer for it to come from Montreal.

Long story short, if you're planning an Ikea kitchen do the check of adding up the cupboard lengths ahead of time. Also, trust your gut when it comes to filler pieces/cover panels. The staff mean well but if something seems wrong it probably is. :oP

Saturday, October 17, 2009

Stairs...

... because climbing in and out of the back of your house gets old fast.


This picture makes me think it's time we ordered another dumpster :\. We got 1 for the main demo but weren't sure how long the bulk of the reno would take so we were waiting til we got close to being done to order another. Now this just looks sad... :P

We also snuck out and ordered our granite today. We had our hearts set on torontogranite.com but the shipment of Kashmir white they had just gotten in was very grey and kind of dark. So we drove to City Home Granite Depot and they ended up having Kashmir white with more warmer tones in it. They showed us the piece we would get installed and we booked measurement/install with them. Torontogranite.com did have some more in stock than when we first went though. They had a white, a creme and a chocolate brown marble in stock that were pretty beautiful, if we weren't so set on the white granite they would have been tempting.

All that and a bag of grout

Cabinets arrive today. *woo*!

Monday, October 12, 2009

Long weekend

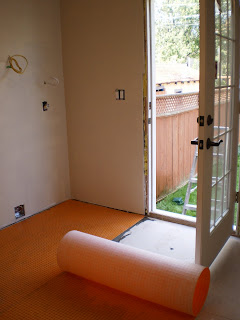
We had a long weekend of sanding, priming, painting and tiling. Here are some pics.