Monday, September 28, 2009
Another E-bay deal
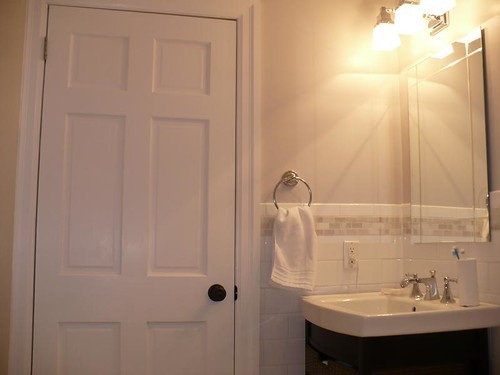
Our faucet arrived in the mail today. It's the Kohler Forte faucet pictured above (but in chrome). We managed to save quite a bit by getting it on E-bay but it was still a bit more than I would have liked.. All the cheaper faucets we looked at just didn't look right to us though.
If you're looking for faucets e-bay is a great place to look. We've actually had pretty good luck buying various home items on e-bay. So far we've used e-bay for our shower halo, house numbers, vanity faucets, kitchen sink and now kitchen faucet.
Sunday, September 27, 2009
Kitchen, the rebuilding begins
It's been a long and very busy week between work and school and one of us getting a bit of a cold. But we did manage to get some work done on the kitchen. The new electrical and drains are in....
The pass through is framed and the new door and window are in (we switched where the original door was to be a window and turned the original window into a door that will let in a lot of light.)
Today we started on insulation and subfloor but neither is really done yet. It's really amazing how many skills we've had to use on this job. It really makes you realize why so many kitchen renovations drag on and on, it's a real coordination of different trades and skills.
Sunday, September 20, 2009
This was the kitchen?
Saturday, September 19, 2009
Kitchen...
Today we started the demolition of the kitchen.
Since our dumpster delivery was delayed we also snuck out to take advantage of a sale on Samsung appliances (http://iframe.shoplocal.com/lowescaproducts/Default.aspx?action=detail&storeid=2598197&rapid=0&pagenumber=0&listingid=-2089054184&offerid=&ref=%2flowescaproducts%2fDefault.aspx%3faction%3dbrowsecategoryall%26storeid%3d2598197%26cattreeid%3d%26SortBy%3d3%26StartRow%3d193). We went to the new Lowes that opened up on Warden near a Future Shop and a Brick to do some wheeling and dealing. In the end we got the deal and the rest of our appliances from Future Shop. Their flexibility on pricing was pretty awesome, you just gotta haggle a bit ;o). Other places we've looked at for appliances included Brick Clearance Center and Sears Outlet in Scarborough. If you're ok with scratch and dent and want a really good deal those places are really worth a look.
Friday, September 18, 2009
Kitchen, your days are numbered...
Temporary kitchen is set up and the dumpster is booked. This last, very nasty room is going to be in pieces in a bin on our lawn very soon. :)
Here are some pics of the temporary kitchen:
And some pictures of the kitchen soon to be demoed. Don't let it's 1940's cuteness deceive you, it's pretty foul.
Here are some pics of the temporary kitchen:
And some pictures of the kitchen soon to be demoed. Don't let it's 1940's cuteness deceive you, it's pretty foul.
Monday, September 14, 2009
Green Machines
After getting a couple of quotes we replaced our old furnace and hot water tank. We got an incredible deal on this Goodman furnace:
We were originally going to compromise and get a cheaper 92% efficiency Trane furnace (with no DC motor so it would get the smallest rebate) but at the last second our installer got a sweet deal on the Goodman 95% efficiency with a DC 2 stage electric motor. This model qualifies for the maximum rebate available so in the end it will come out to being less than we had originally budgeted for the lower end Trane. This should help bring our gas bill down in December! One thing we didn't realize is that these high efficiency furnaces produce a good amount of condensation when they are running so it is recommended that a drain be located nearby. Since we intend to relocate the washer and dryer nearby, when we run the drain for that we will put in a floor drain for the furnace.
For our water heater we got this Rinnai tankless hot water heater:
It is great to have the massive hot water tank out of the basement; and now we will never run out of hot water again. I had to open it up and change one of the jumper settings to let us set it above 120 degrees fahrenheit but after I changed that it gets the water nice and hot. It delivers a more consistent temperature than our old hot water heater that would gradually get less hot as the shower went on.
Wednesday, September 9, 2009
Hardwood
Having laid hardwood in our last house and (almost) everywhere in our current house there are some tips and tricks that we have learned, mostly through trial and error, about laying hardwood. We figured we might as well share them on our blog.
Tips
#1 buy your own nailer and air compressor - a decent hardwood nailer can often be found on craigslist, ebay or an alternative hardware store for less than 200$ and an air compressor can be had for as little as 150$ at a big box store. Having your own hardwood nailer allows you to take your time and get things right rather than rushing through the job to trying to save a couple hundred bucks in rental. If you want to recoup this cost after the job sell them afterward on craigslist you will probably end up being out less than if you had rented!
#2 use foam underlay - this was a trick we picked up from our neighborhood contractor, using a foam underlay(we used Roberts 2 in 1, it's next to the hardwood in home depot) absorbs sound, provides a moisture barrier(less expansion/contraction) and also evens out any small abnormalities in the subfloor.
#3 make sure your first row is perfect - Pick the longest continuous wall in your space and use it as a reference point, measure out from the wall 1/4 inch + 2*the width of the hardwood (or whatever multiple will allow you to use the nailer). Use whatever straight scrap wood you have lying around, we used some 2" and 3" strips of mdf, and secure them to the subfloor, every 8" using wood screws. Doing this allowed us to snug up hardwood against the mdf and nail it with the nailer. If you can't lay a continuous line across your longest wall(like in our livingroom) you can measure out a foot or two until you can lay it in a continuous line then us the next tip to work backwards
#4 working backwards - if you end up in a situation where you have to go backwards the best way to do this is using something called "slip tongue" that makes the groove of the hardwood into a tongue. Slip tongue can be found at most hardwood stores and is incredibly cheap(home depot used to carry it but not in our area anymore).
#5 tight spots - for the last couple rows I suggest switching to using staples in the hardwood nailer. You can usually use a single staple in the ends of the wood without cracking it.
#6 get a grip - good vicegrips are very useful for removing half nailed nails
#7 snug it up - ensure that the wood is as tight as possible before you nail it, also use nails liberally it may cost a little more in nails but it will be well worth it in the finished product. Also, be sure to leave 1/4 inch around the edges so if the wood does expand it won't cup.
#8 working around old trim - if your trim is too old and fragile to be removed there is a way to make the hardwood not look weird. Take a piece of the hardwood and mark how high it comes on the trim. Then use a flush cut saw to cut out the trim. Then when you put the hardwood around the trim put it under the trim you cut. This way it looks like the trim was done after the hardwood (as it would be normally done).
Friday, September 4, 2009
Going Green
Yes dear readers, we've finally gotten a home energy audit done. Given that we need a new hot water tank and furnace we figured it was time to bite the bullet and find out how inefficient our house is.
We haven't gotten our final report back yet, but the rebates available are impressive. We knew about the furnace and hot water tank rebates, but we also learned that we can get $80 for the window and door we put in our kitchen. We can also get $1,250 for framing and insulating our basement. Given that this is a task we could do ourselves, we suspect the cost will be less than the rebate to get this task done (*yippee*). It may also provide the much needed motivation to actually finish the basement.
We also learned that there is money up for grabs if you decrease air leaks. Air leakage is measured by doing a blower test where they seal the house and run a fan in the front door that measures how much air it sucks (or something to that effect). They feed this data to a computer program that will tell effectively how big of a hole in our house all the tiny leaks add up to. There is money up for grabs for decreasing the size of this hole by a certain percentage. Given that the remaining electrician holes in the kitchen are a huge source of leakage re-doing the kitchen should help us make a huge dent in our air leakage. Things like caulking around trim and sealing electrical boxes also helps.
We're really excited to see the official report that will tell us our actual efficiency number and we look forward to increasing it over the next few months!
In the mean time we're lining up furnace quotes *woo*.
Subscribe to:
Posts (Atom)