Sunday, August 29, 2010

All Wrapped up

So, we got a quote for siding. It wasn't outrageous but it didn't seem like they would do the job to the level we wanted it done. Their proposed solution around the window was J-mold and with no mention of building wrap.

When we installed the kitchen window, we caulked around it but it was basically sitting there with caulk around it and a piece of plywood below it. Given that water can pass onto the underside of the siding we wanted to ensure that the edge around the window was really weather tight. By this point we realized that if we wanted this job done how we wanted it it was probably just easier to do it ourselves. So this weekend we prepped the kitchen for siding, we flashed around the window (using a home made bending solution):

Filled in the gaps around the door and added brick mold
and of course wrapped everything in building wrap. Hopefully we will get to side it this week/weekend and then we can move on to the deck!

In other news we used the money we saved on hiring out siding to hire our contractor neighbor to arrange and install a custom size door from the Habitat for Humanity Re-store in the basement walkup. Things are moving along again!

Sunday, August 15, 2010

Yard Plan

There hasn't been much in the way of progress made on the outside of our house since the last post. We're mainly being held up since we're hiring out the siding and we tend to procrastinate more when working with pros than when doing things ourselves :P. With the help of Homestars, we got our butts in gear today and contacted a bunch of local companies with the hopes that we can get it set up soon. We would do it ourselves, but we want to make sure the flashing around the new window and door from the kitchen are done right which requires people with equipment + know-how for working with aluminum.

In the mean time we've been thinking about the final design for the deck/yard. Bear in mind this project is still in the realm of "pipe dream" and won't get finished until next summer, but this is the plan:


We're contemplating taking a free table from our neighbour (hence the over-sized table on the deck) but looking at it in the diagram it may not be meant to be... unless we convert our whole yard into a deck... This is also based on estimated measurements of our yard. Depending on the actual length we may need to lose a boxwood or 2 (or shorten the deck).

Our goal for this summer is to get the deck done. Next summer we will tear down the garage/shack, build a new fence and parking pad. And to think when we moved in we thought we'd be parking in the back within 4 months... we were so naive :P.

Sunday, July 18, 2010

Almost out of the hole..

So its been a busy few weeks but we have almost finished up the bulk of the walkup. Since last time we have finished the walls, poured the floor and installed a nice new trench drain with a 3 inch drain attached, so hopefully this should prevent any more flooding.


The concrete needed some minor re-contouring after it was poured to fill some low points but now its all gently sloped towards the drain. We still need to call around to find someone to custom make us a door for opening that is smaller than any standard exterior door. The door that was there seems like was a converted screen door that let wind blow right through it in the winter:
Then its on to re- siding the kitchen add on and then a back deck!

Wednesday, June 16, 2010

Rebuilding the basement walk up

Before we moved in, the back of our house looked like this:

the white structure poking out the side of the kitchen is the basement walk up. The home inspector noted that it was a DIY job and that it might need repair at some point. We found out the extent of its problems about 8 months after we moved in and a torrential rainstorm unleashed streams of water through cracks in the side of the walk up. It leaked *really* bad given the right type of rain storm. We went from bone dry basement to 2 inches in some spots, being from Alberta where basements are usually dry it was a bit of a shock.

Our master plan for fixing the walk up had 2 phases. In the first, we ran a 4" drain line to the door leading to the walk up (originally it was a drain hooked to a garden hose type thing that tied into an existing drain in the main part of the house).

We are now embarking on the second phase of this project, tearing off the old walk up enclosure and building a new concrete base (with a drain *outside* of the house). First we tore off the structure. This took all of 10 minutes.


We then dug a 5'x8'x5.5' hole with the help of our contractor neighbor's laborers.

Around the edge of the hole was a trench that our contractor neighbor poured footings into for us last week. Last weekend and this week we've been working on building the walls for the new walk up out of concrete blocks.


Today we were chatting with our contractor neighbor and I guess he showed another contractor in the neighborhood our block work and he had a hard time believing we were doing it ourselves. After slaving away on a project it's always nice to get feedback like that :o).

This project is a part of a larger vision to make the back of the house less ghetto. The next steps are to side the kitchen, build the deck, tear down the shack/garage and build a fence; but all things in time.

Saturday, June 12, 2010

We wish we were as good as this guy...


So it's been nearly a month since our last post. Between our current project and sorting out some logistical issues in our real life there hasn't been much time for blogging. We're currently working on the restructuring of our back walk up stairs (the ones that resembled Niagara Falls whenever it rained). This has so farinvolved digging a 5'x8'x6' hole and pouring footings. We're now building the block wall, then it'll be on to the drain/floor and new stairs. While we knew mostly what to do for this project we grossly under estimated how physically hard it would be. Luckily we were able to call in some manual labor on short notice to help with some of the heftier parts. There will be a blog post with pictures/etc when we get some more time.

Wednesday, May 19, 2010

Stair railing complete!

The stair case is now 99% complete. It still needs new light fixtures at the base and top of the stairs, a piece of trim where the stair case meets the plaster, and some general sanding/touching up. But for now it's pretty good we think. We have a house guest coming on Friday and need to get the house in shape so this wasn't a minute too soon!

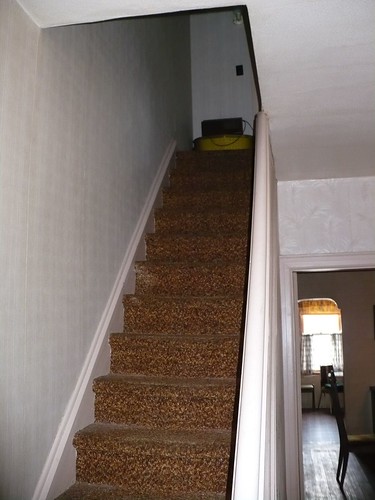
Here's what it looked like before:

Here it is now:

Keep in mind that *none* of this is original to the house. The newels are cedar 4x4s clad with oak/oak trim, the railing is from central fairbank lumber (that was a gong-show and a half...), and the balusters were ripped out of a 1x8 of select pine. This meant that the balusters are rectangular and not square which we think gives the stair case a bit more of a craftsman-type feel.

Monday, May 10, 2010

The prettiest thing in our house right now...


...is this bit of railing we installed yesterday. Once we had all the pieces cut, painted and stained assembling the railing only took about 15-20 minutes. It was pretty sweet. Let's hope the main railing goes as smoothly.